We are doing an experiment on building a chocolate bridge, to test how heavy can a chocolate hold.
Safety
- We needed to be careful of the molten chocolate because of the heat
- Do not eat any of the chocolate as it may be contaminated
Objective
To design a chocolate bridge that can support as much load as possible.
Materials and Equipments:
Before the Experiment
- cardboard
- paper
- aluminum foil
- cello tape
- protractor
- ruler
- scissors
- spatula
- mass scale
- microwave to melt the chocolate
- hot water to melt the chocolate
- 17 grams of molten chocolate
During the Experiment
- freezer to freeze the chocolate
- 2 chairs
- weighing metals and the metal hook
- strings
Procedure:
Before:
1. Design the shape of the mold
2. the volume of the mold should be 12 cm3 or less, and the length should be more than 4 cm.
3. Draw a net of the shape and calculate the right size
4. Draw the real net on the cardboard paper using ruler, pencil etc. and other drawing materials
5. Use scissors to cut the net out
6. Draw another net on the aluminum foil, but bigger in size so that it can wrap around the cardboard net
7. Use scissors to cut it out
8. Fold and overlap both nets, and use cello tape to stick it together
9. Use microwave and hot water to make molten chocolate
10. Use spatula to put the 17g of molten chocolate into the folded net, make sure it is full.
11. Put it into the freezer to harden it, and then take it out when the experiment start.
During:
1. Take out the chocolate from the freezer, and take it out from the net
2. Use a mass scale to weigh it, the weight should not be higher than 13.6 g.
3. Prepare the setting of the chairs which is 4 cm apart.
4. put string around the "bridge" and put it on top of the chairs
5. Attach metal hook to the string and start hanging weighing metal onto it, which weighs: 10g, 50g and 100g
6. Continue put weights until the bridge collapse
7. Record down results
My Partner and My Design
My partner, Arthur and I designed a cuboid, it is because it has flat surfaces, and it is balance, so it won't topple over easily and it will be stable.
Length: 5 cm (so it will reach the 2 chairs which is 4 cm apart)
Height: 2.4 cm (it is quite thick, so it can withstand and handle heavier loads.
Width: 1 cm (so it can follow the rule 12cm3, because 5 times 2.4 times 1= 12)
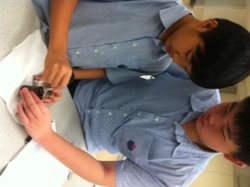
Arthur and I were pouring molten chocolate into our molds.
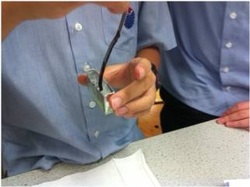
We are stirring it to make it equal and balance, it will be spread over to m make the right size for our mold.
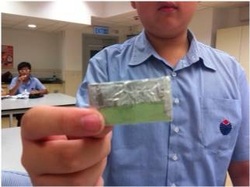
Our design of mold, which is a cuboid!!! Although it looks small, it is to make the rule of 12cm3 volume, and also outreaching over 4 cm.
Results
Our results of the chocolate bridge was quite good, our "chocolate bridge could hold 5500 grams, which is quite a heavy load. Although we are not the strongest, we are still not the weakest. GOOD NEWS!
Discussion and Conclusion
Well, as long as the experiment goes, I think that what really makes the chocolate strong was depending how you design it, how you place it and how did you make it.
Designing: The results really depends on what did you design, researching some of the strong shapes, like trapezium, cuboid, can make 50% of your experiment work already. Also, thinking of the size is also a matter, the length, width and height should be in the correct size.
How did you make it: Before making it, of course planning is one of the most important. During the making process, somethings should be thought of are:
- the shape, width, length, height must be balance
- the size of aluminum foil should be bigger than the net of cardboard, in order to wrap it around
How you place it: Placing the chocolate between the chair is a pretty important job. Things that needed to be thought of are:
- angles
- steady and balancing
Also, placing the weighing metal should be steady in speed, even one shake affects the weight of the chocolate bridge can hold.
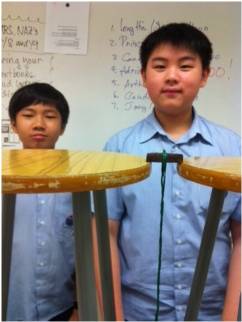
Don't just look at our chocolate bridge, look at the size of me and Arthur!
In this picture, you can see that the string wraps around the chocolate, and the chocolate was placed between the two equal sized chair.
In this picture, you can see that the string wraps around the chocolate, and the chocolate was placed between the two equal sized chair.
 RSS Feed
